Importing a Schedule into Preseria using Excel
This tutorial explains how to import your presentation schedule into Preseria using Excel. This is usually quicker than manually adding sessions and presentations via the user interface, especially when dealing with hundreds of presentations.
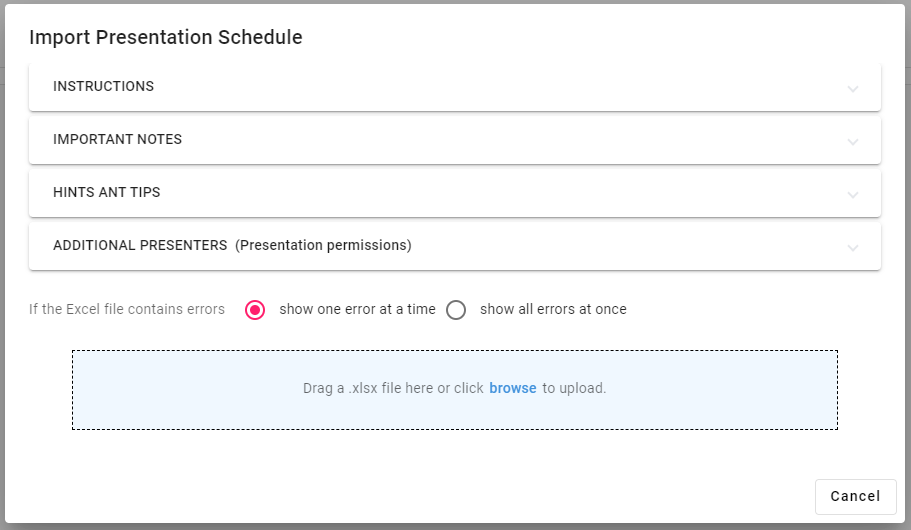
Import your event schedule using an Excel sheet
Hint
You don’t need Microsoft Office to complete this process. Free tools like Google Sheets can also be used to create compatible .xlsx files.
📥 Download the Excel Template
The Excel import template is pre-filled with example data to help you understand the required formatting.
There are two versions of the template:
- US Format — 12-hour clock (h:mm AM/PM) and month/day/year dates.
- EU Format — 24-hour clock (hh:mm) and day/month/year dates.
⚠️ Do not mix US and EU date/time formats in the same sheet.
Download Excel Import Template
🧱 Excel Columns Explained
| Column | Required | Description |
|---|---|---|
| Session Title | ✅ | Title of the session (max 255 characters). |
| Custom Session ID | ❌ | Reserved for API integration. Leave blank. |
| Session Location | ✅ | Location/room of the session (max 100 characters). |
| Session Date | ✅ | Date of the session. Follows selected format (US: mm/dd/yyyy, EU: dd/mm/yyyy). |
| Session Start | ✅ | Start time of the session. |
| Session End | ✅ | End time of the session. |
| Presentation Start | ❌ | Start time of a specific presentation (optional if using duration). |
| Presentation End | ❌ | End time of the presentation. |
| Presentation Duration | ❌ | Length in minutes (0–999). Used if start/end times are omitted. |
| Presenter Email | ✅ | Email address of presenter, or keyword BREAK (case-insensitive, max 80 characters). |
| Presenter First Name | ❌ | First (and optionally middle) name (max 50 characters). |
| Presenter Last Name | ❌ | Last name (max 50 characters). |
| Presentation Title | ❌ | Title of the presentation (max 255 characters). |
| Custom Presentation ID | ❌ | Reserved for API integration. Leave blank. |
| Presentation Custom Value 1 | ❌ | Optional custom tag (e.g., track, type). Leave blank if unused. |
| Presentation Custom Value 2 | ❌ | Another optional custom tag. Leave blank if unused. |
You can extend each row with additional presenters. Each additional presenter is given three columns: Email, First Name, and Last Name. For example, to add two additional presenters:
... | Additional Email 1 | Additional First Name 1 | Additional Last Name 1 | Additional Email 2 | Additional First Name 2 | Additional Last Name 2 |
These additional presenters will be able to log in and upload files on behalf of the main presenter.
🧩 Structure & Rules
🧠 Understanding the Session–Presentation Structure
Each row in the Excel file represents one presentation. That means for every presentation, the corresponding session metadata (the first five columns) must be repeated:
| Session Title | Session Location | Session Date | Session Start | Session End |
|---|---|---|---|---|
| Same values for each presentation in the session |
Why is this important?
Preseria follows a structured model:
Conference > Sessions > Presentations
A session typically groups multiple presentations that happen in the same room, during the same block of time.
Example:
| Session Title | Session Location | Session Date | Session Start | Session End | Presentation Title |
|---|---|---|---|---|---|
| Session A1 | Room 101 | 06/17/2026 | 08:00 AM | 10:30 AM | Talk 1 |
| Session A1 | Room 101 | 06/17/2026 | 08:00 AM | 10:30 AM | Talk 2 |
| Session A1 | Room 101 | 06/17/2026 | 08:00 AM | 10:30 AM | Talk 3 |
Here, all three rows belong to the same session (A1). They share identical session metadata.
🤔 What if your event doesn’t have grouped sessions?
Some conferences don’t naturally group presentations into sessions. Instead, every presentation might be its own “session” (e.g., one presenter per room at a time). This can lead to confusing navigation in the Preseria UI, since each presentation will live inside its own session.
In these cases, we recommend the following opinionated workaround:
Use the session title to group by room and day, such as: -
"Day 1 - Room 303"-"Day 2 - Auditorium"
Then list all the day’s presentations in that room under the same session. This improves navigation and keeps the interface clean.
Example:
| Session Title | Session Location | Session Date | Session Start | Session End | Presentation Title |
|---|---|---|---|---|---|
| Day 1 - Room 303 | "Room 303 | 06/17/2026 | 08:00 AM | 14:00 PM | Opening Remarks |
| Day 1 - Room 303 | "Room 303 | 06/17/2026 | 08:00 AM | 14:00 PM | Keynote Talk |
| Day 1 - Room 303 | "Room 303 | 06/17/2026 | 08:00 AM | 14:00 PM | Technical Talk |
Even though there’s no “formal session” grouping in your event program, this approach avoids creating unnecessary UI layers and makes it easier for moderators and staff to manage the schedule.
Rules and Recommendations
- The first five columns define the session (title, location, date, start, and end times).
- The next columns define a presentation belonging to the session.
- The row order of presentations determines their order within a session.
- Specifying the timing of presentations is optional. However, if you choose to include it, you must use one of the two methods for each session:
- Start & End Times:
Fill in the “Presentation Start” and “Presentation End” columns for each presentation.
⚠️ The first presentation must start at the session's start time, and all presentations must be back-to-back with no time gaps. - Duration Only:
Leave the “Presentation Start” and “Presentation End” columns blank, and instead fill in the “Presentation Duration” column. Preseria will automatically calculate the start and end times within the session block. - ⚠️ You cannot mix the two methods in a single session.
- Start & End Times:
- To add breaks within a session, enter the keyword
BREAKin the Presenter Email column.
Breaks between sessions usually don’t need to be included.
If you want to upload content for a break — such as Break Slides — you can either:- Create a dedicated Break Session, or
- (Recommended) Add a 0-minute Placeholder Presentation within the existing session and upload your break media to that presentation. You'd use the same approach for any session media that isn't tied to a presentation, such as Walk-in Slides.
⬆️ Upload Your Excel File
Before importing, make sure your event (conference) has been created:
- Navigate to Conferences.
- Click New Conference and fill out the event details.
- Open the created conference.
- Click Import Schedule and upload your
.xlsxfile.
Preseria will validate the contents. If there are formatting issues, you’ll receive an error with details about which rows need fixing.
If the import completes successfully, your sessions and presentations will appear in the schedule.
🔁 Re-importing or Fixing Errors
If you made mistakes in the import file (e.g., wrong emails or titles), you can:
- Manually fix individual sessions or presentations in the UI, or
- Delete the conference or specific sessions and start the import over.
To delete a conference:
- Click Conferences in the top menu.
- Click the three-dot menu next to the conference.
- Choose Delete and confirm.
After deletion, re-create the conference before attempting a new import.
➕ Importing Additional Sessions and Presentations Later
You may import in multiple stages. For example, you can first import the session structure that is finalized and send invitations to those presenters while some schedule details are still pending.
Don't import the same data twice!
When importing additional data, follow the same steps as before — but do not include rows that have already been imported, as they will be duplicated.
Always remove existing rows from your Excel file before importing new ones.
🛑 Excel Import Limitations
- The Excel import cannot update sessions or presentations once they’re imported.
- Either delete previously imported data and re-import, or use the Preseria user interface to update imported data.